The Asphalt Shingle Roof Installation Process Explained Step by Step
People searching for asphalt shingle roof installation often want to understand the process and find experienced local contractors who can handle each step professionally.
Understanding the asphalt shingle roof installation process explained step by step can help property owners make informed decisions about their roofing needs. Whether planning a new roof or replacing an aging one, knowing what to expect can ease concerns and ensure the project aligns with practical goals like durability, appearance, and long-term performance. Local contractors specializing in asphalt shingle roofing are equipped to guide property owners through each phase, providing clarity and confidence throughout the process.
Exploring this topic is especially relevant for those who want to better understand how a professional installation ensures a secure and lasting roof. From assessing the existing structure to the final inspection, knowledgeable service providers can handle each stage efficiently, helping property owners avoid common pitfalls and achieve a high-quality result. Keep reading to learn more about how local experts can support your roofing project, making the process straightforward and dependable.
- Residential homeowners - when considering a new asphalt shingle roof, local contractors can guide them through the installation process step by step.
- Property managers - managing multiple buildings often requires efficient roof replacements, with local service providers ensuring proper installation procedures.
- Roof replacement projects - for homes needing a complete roof overhaul, local pros follow the asphalt shingle roof installation process explained step by step to ensure quality results.
- New construction builders - during new building projects, local contractors implement the asphalt shingle roof installation process to meet structural and aesthetic standards.
- Home improvement enthusiasts - those upgrading or repairing their roofs can rely on local service providers to handle the detailed installation process correctly.
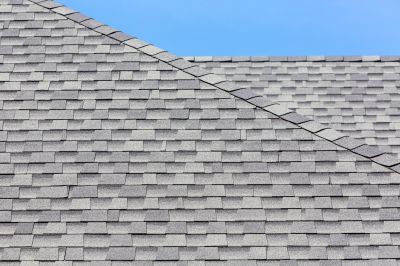
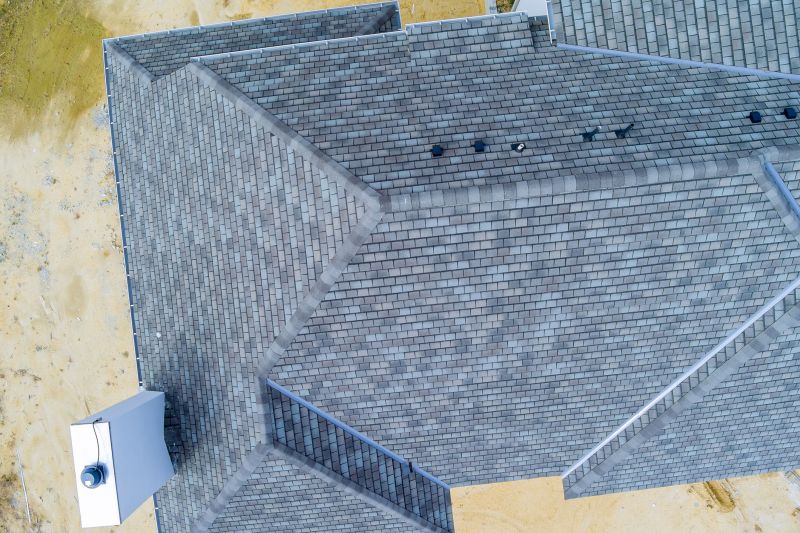
When homeowners search for the asphalt shingle roof installation process explained step by step, they are usually looking to understand what the entire project entails from start to finish. This includes gaining clarity on each phase of the installation, such as removing the old roof, preparing the roof deck, installing new underlayment, and laying down the shingles. Many people are planning a new roof replacement or a complete upgrade to their existing roofing system, often because of age, damage, or the desire to improve curb appeal. Understanding this process helps homeowners make informed decisions, anticipate what to expect during the project, and ensure they are working with qualified local contractors who follow proper procedures.
This topic also relates to common problems or plans homeowners face when considering roofing work. For instance, issues like leaks, frequent repairs, or storm damage often prompt a need for a new roof installation. Homeowners may also be exploring options to upgrade their roofing for better durability or aesthetics. The asphalt shingle roof installation process explained step by step provides a clear overview of what the project involves, so property owners can evaluate whether the scope aligns with their needs. It also helps them understand how local service providers approach the job, ensuring that the work is thorough, properly executed, and tailored to the specific conditions of their property.
Properties that typically come up in discussions about asphalt shingle roof installation include single-family homes, townhouses, and small commercial buildings. These types of properties often have pitched roofs, which are ideal for asphalt shingles due to their durability and affordability. Homeowners planning to replace an aging roof or those building a new residence frequently seek out local pros who specialize in this type of installation. Understanding the process helps property owners see how the work will be carried out on their specific property type, whether it’s a traditional home or a multi-unit complex, and how local contractors adapt the installation steps to different roof designs and sizes.
Overall, the asphalt shingle roof installation process explained step by step is a practical guide for homeowners who want to understand what happens during a roofing project. It emphasizes the importance of working with experienced local service providers who follow proper procedures, from initial assessment to final inspection. By familiarizing themselves with each phase of the process, property owners can better communicate their needs, ask informed questions, and ensure that their roofing project is completed efficiently and effectively. This knowledge connects directly to real projects, helping homeowners feel more confident in choosing the right local pros to handle their roofing needs.
Roof Inspection Services - professionals who assess roofing conditions utilize similar skills and tools when evaluating the integrity of asphalt shingle roofs during installation projects.
Gutter Installation and Repair - these projects require planning and precise work that aligns with the detailed steps involved in installing asphalt shingle roofs to ensure proper drainage.
Attic Ventilation Services - proper ventilation planning is essential in asphalt shingle roof installation, making these services relevant for ensuring roof longevity and performance.
Roof Repair Services - repairing damaged or aging roofs involves similar techniques and knowledge as installing new asphalt shingle roofs, requiring careful planning and execution.
Flashing and Waterproofing Projects - these services involve sealing and protecting roof edges and joints, which are integral parts of the asphalt shingle roof installation process.
Roof Decking Replacement - replacing or repairing roof decks is a foundational step that supports asphalt shingle installation, requiring similar skills in structural assessment and preparation.

When comparing local contractors for asphalt shingle roof installation services, it is important to consider their experience with similar projects. Homeowners should inquire about the types of roofing jobs they have completed and whether they are familiar with the specific steps involved in the asphalt shingle roof installation process explained step by step. A contractor with a proven track record of handling comparable projects can often demonstrate a deeper understanding of the necessary materials, techniques, and potential challenges, helping to ensure the work is completed efficiently and effectively.
Clear written expectations are essential when evaluating service providers. Homeowners should seek detailed proposals or estimates that outline the scope of work, materials to be used, and the sequence of installation steps. This transparency helps prevent misunderstandings and provides a basis for comparing how different contractors approach the project. Reputable local contractors often provide references or examples of previous work, allowing homeowners to verify the quality of their installations and gain confidence in their ability to meet project expectations.
Effective communication is another key factor when choosing a service provider. A reliable contractor should be responsive to questions, willing to explain the asphalt shingle roof installation process explained step by step, and able to keep homeowners informed throughout the project. Good communication fosters trust and ensures that any concerns or adjustments can be addressed promptly. By focusing on these aspects-experience with similar projects, clear written expectations, reputable references, and open communication-homeowners can make more informed decisions when selecting local contractors for their roofing needs.
Property owners often search for the asphalt shingle roof installation process explained step by step when they are planning practical projects around their homes and businesses. Local pros provide Asphalt Shingle Roof Installation services for everyday jobs and straightforward project options.
Homeowners in the area often search for information about the asphalt shingle roof installation process explained step by step to better understand what’s involved when replacing or upgrading their roofs. Many property owners seek clarity on how local contractors handle each stage, from removing the old roofing material to ensuring the new shingles are properly secured and weatherproofed. Knowing what to expect can help them make informed decisions and feel confident when considering professional services for their roofing needs.
Understanding the installation process also helps property owners recognize the importance of trusting experienced local service providers to handle the job efficiently and correctly. Whether they’re dealing with storm damage, old roofing materials, or simply upgrading for better durability, many are interested in how local contractors manage each phase of the project. This knowledge can support them in comparing options and connecting with qualified professionals who can deliver quality results for their asphalt shingle roof installation.
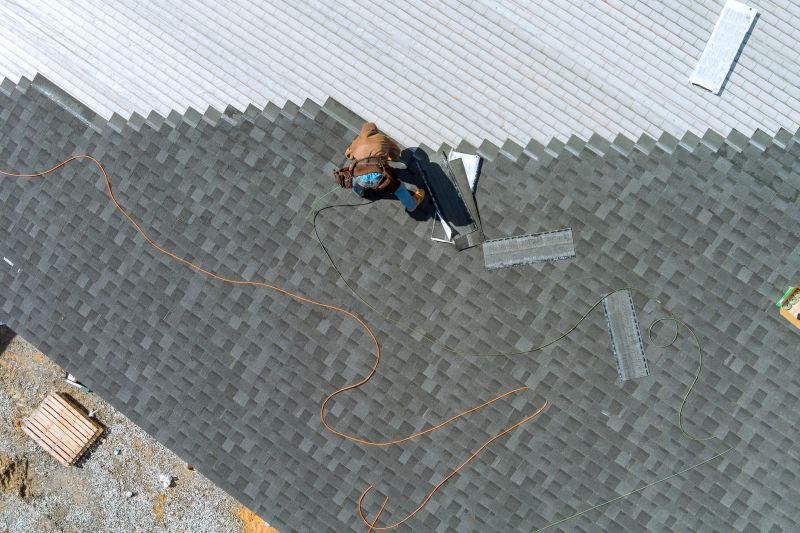
What are the main steps involved in the asphalt shingle roof installation process explained step by step? The process typically includes removing the old roofing, inspecting and preparing the roof deck, installing underlayment, applying the asphalt shingles, and finishing with proper sealing and flashing. Local contractors can handle each of these steps to ensure a quality installation.
How do local service providers prepare the roof before installing asphalt shingles? They inspect the roof deck for damage, clean the surface, and ensure proper ventilation and insulation. Proper preparation helps ensure the shingles are installed correctly and last longer.
What materials are used during the asphalt shingle roof installation process explained step by step? The process involves asphalt shingles, underlayment, flashing, nails, and sealant. Local pros select quality materials to match the specific needs of each roof.
Why is proper installation important in the asphalt shingle roof installation process explained step by step? Proper installation prevents leaks, extends the roof's lifespan, and maintains the integrity of the roofing system. Experienced local contractors follow best practices to achieve this.
Can local contractors customize the asphalt shingle roof installation process to different roof types? Yes, they can adapt the process to various roof designs, slopes, and structures, ensuring a proper fit and durable result for each property.
Understanding the installation steps - property owners can familiarize themselves with the typical phases of asphalt shingle roof installation to better plan their project with local contractors.
Selecting quality materials - choosing durable asphalt shingles and accessories ensures a longer-lasting roof, with local service providers offering guidance on options.
Preparing the roof deck - ensuring the existing roof is properly inspected and prepared can help prevent issues during installation, which local pros can assist with.
Scheduling professional installation - coordinating with local contractors for a proper installation process helps ensure the asphalt shingle roof is installed correctly and efficiently.
If you are thinking about the asphalt shingle roof installation process explained step by step for a property, this guide is meant to help you understand this topic, the typical project types, and how different options might fit your plans.
When you are ready, you can use the quote form on this page to share a few details about your project. From there, local pros can review the basics and follow up with options that match what you have in mind.